I suggest to begin
acquaintance to animation in Trainz with the simple task - animation a collar.
I found a similar lesson once on site Auran, there it was a question of moving.
The primary goal to understand main principles of animation. On the basis of
this lesson you can create other, more difficult objects in which it is
possible to use animation, for example depot, moving, the industry etc.
I will count a
lesson on absolutely green users. So those who already has an operational
experience in Max, can pass the first part in which we will be engaged in
modelling.
I do not apply for absolute true at creation
of the given lesson. Probably, you can reach result and other ways, using any
other principles of modelling or applying other software.
That it is required
to us:
1. Max 8
2. Max 5 (if at you Max given
version has no glitch at texturing can do without 8 versions)
3. Photoshop - any version (I use the seven)
4. Plug-ins from Auran for Trainz under Max 4 (it is a plug-in, instead
of for 6 versions as this exports animation. Plug-ins can be found on a site www.auran.com)
5. Textures
6. It is a little time and desire.
It
is assured, that 90 % of success low poly models, as a rule, bear on themselves textures. Therefore try to create this or that model only when you will have
qualitative textures on hands. It is possible to do textures, and it is
possible to take advantage of a world wide web. We will go the second by. On a
site <http://www.cgtextures.com/>
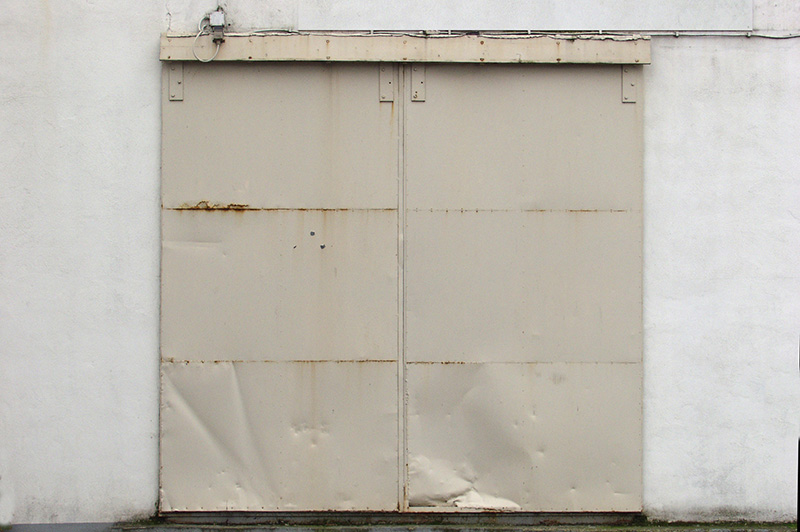
we find the texture which has liked us of gate and concrete (for support of
gate). I have stopped on this: <http://www.cgtextures.com/texview.php?
id=776&s=S&PHPSESSID=fc653243d30b32b8525249992a1670af .
In a case with this texture, we do not need to search for a concrete texture separately, we can
use already available walls.
At once we will be defined
with the size and type of opening of our gate. We will have gate with the sizes
of a shutter 2,5х3 metre, with two shutters, with classical
opening, with support in the form of two concrete columns of square section.
We prepare textures. Here
it is possible to go two ways:
1. To make one structure on object, in our case it is not required to us
of additional actions on gathering of textures in one file.
2. To make some separate textures for shutters and support different
files.
In our case, we should cut out textures from the given file.
We will go on the first way
as in this case we will receive a prize in weight of files of textures and
quantity of files to loading in memory of a video card.
As in game the given gate
will be visible both from apart, and at a short distance, the compromise
between quality and productivity we will have textures the permission 256х128. Our file with textures already has expansion jpg, i.e. is already
compressed, therefore I offer it and to leave, not converting a texture in a
format tga.
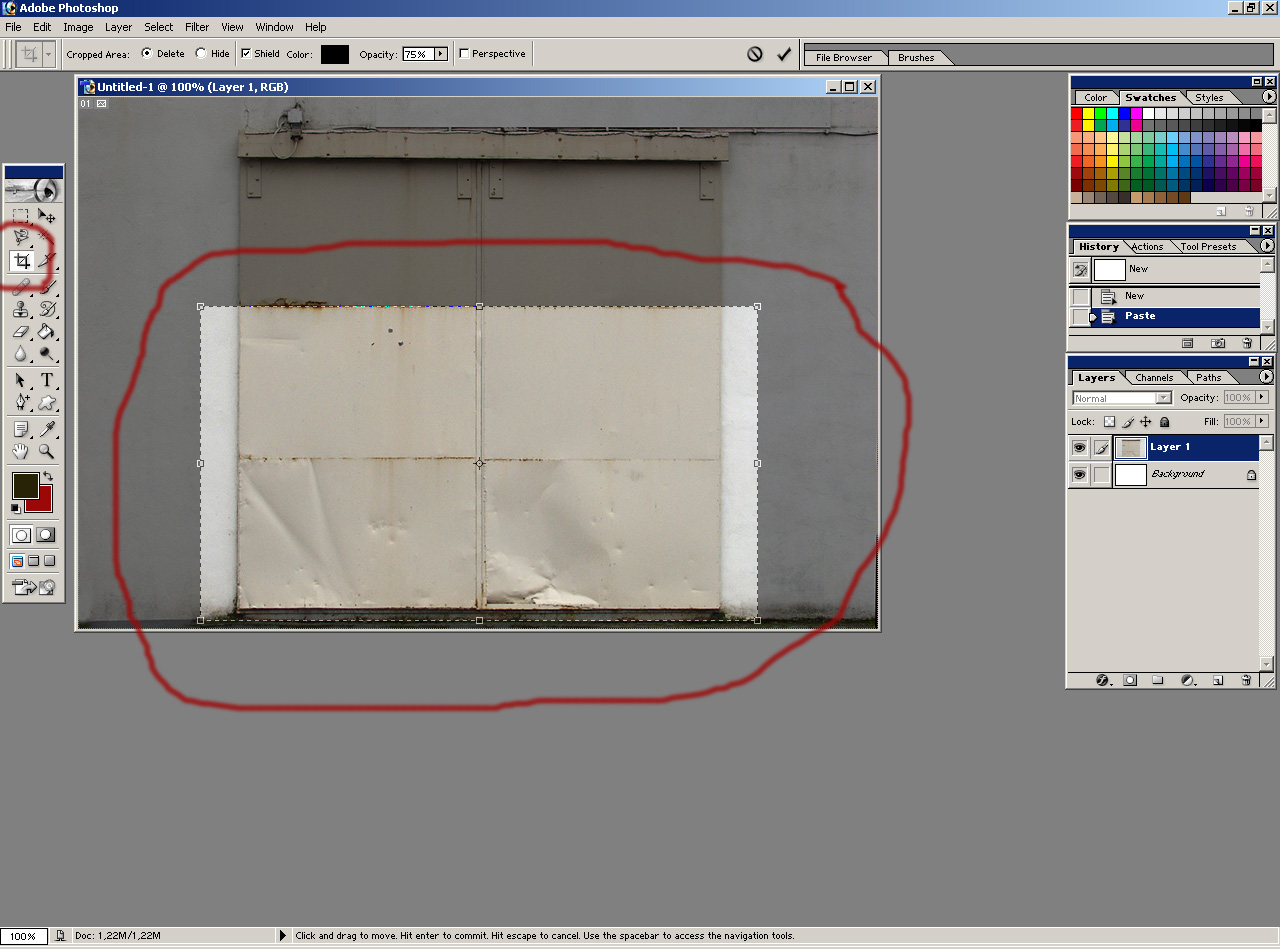
Let's open a texture
Photoshop th and we will cut off all superfluous c help Crop Tool.
Now we will look the permission and the sizes of the received picture.
We come into menu Image - further Image size and in the opened table we check
the sizes and the permission. At me it has turned out here so:
The permission it is established as 72 pixels on inch (the monitor
permission). My file had this permission, thus width of a file left just in 256
points.
I needed to correct height
with 145 to 128, having cleaned preliminary a tick with Constrain Proportion.
Be convinced, that the file has RGB a format, instead of CMYK, having come in
menu Mode. The texture is ready. We keep it.
Here a total kind:
Further it is required to us Max, me 8 as 5 at me not correctly displays textures at texturing. If at you such problems are not present, use at once
5.
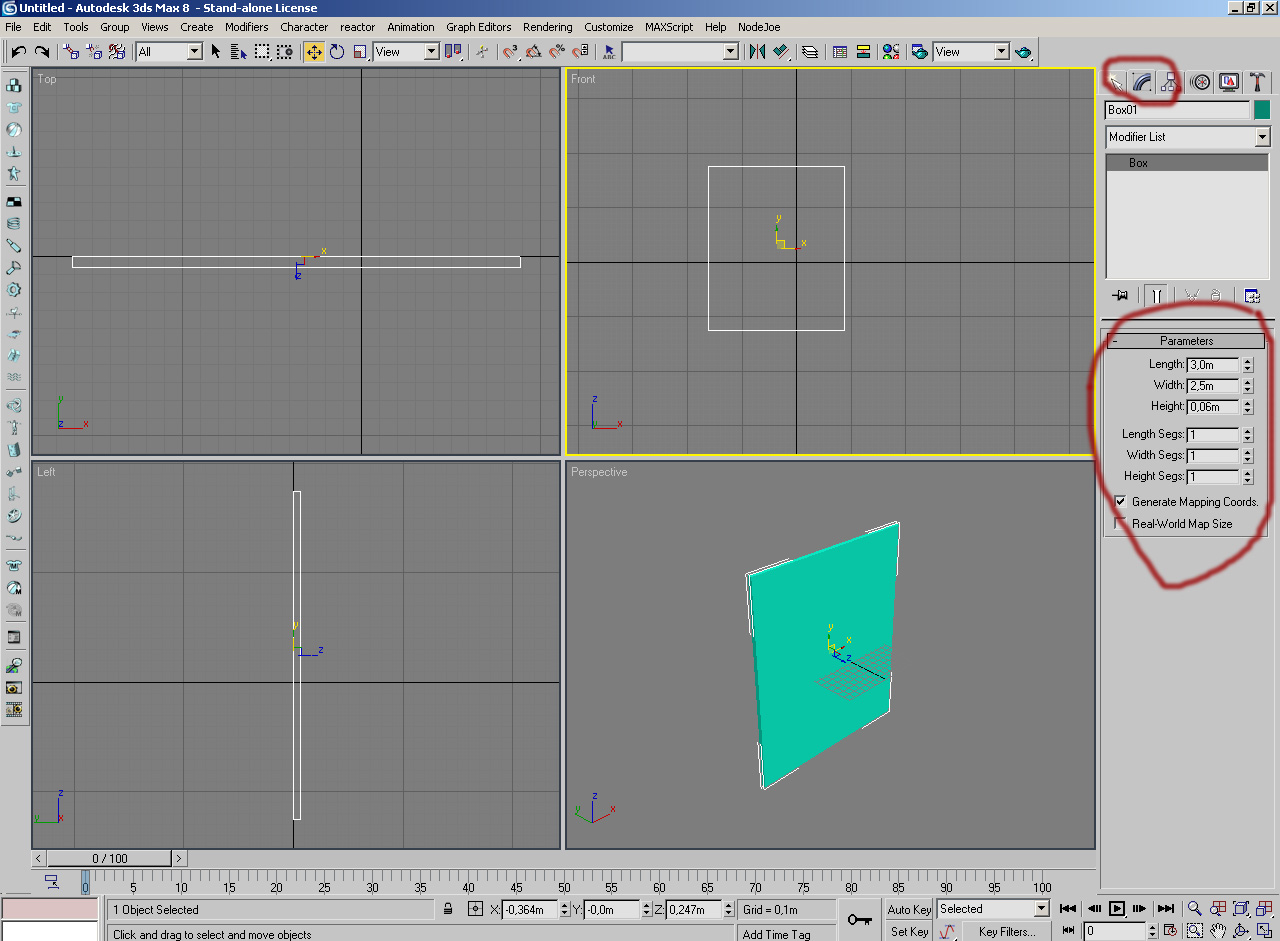
We open Max and modelling
our gate, preliminary having established system of units as metric (Customize -
Unite Setup). It is required to us only two boxings. At first model a goal
mouth. For this purpose in menu Crate we choose bookmark Standard Primitive
(costs by default), further Box and in the front view (front) we create boxing,
simply holding the left button of the mouse and moving it. Create while
conditional boxing. Further, we allocate boxing with a mouse and we come into
menu Modify and, in a roll of parametres we establish the sizes of our shutter:
Length - 3,0 m. Width - 2,5 m. Height - 0,06 m. It will be ours height, width
and depth accordingly.
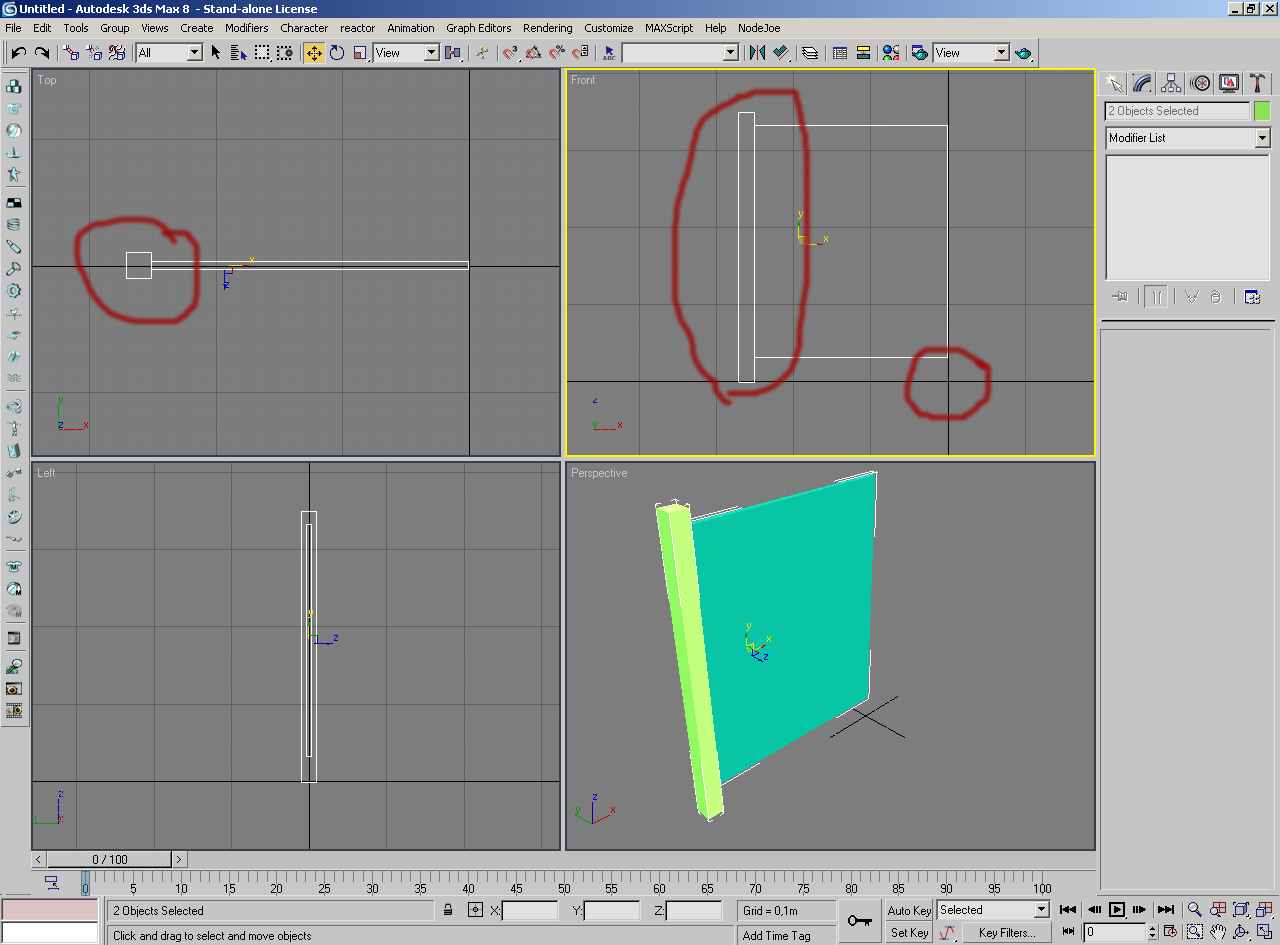
Further we will create boxing for a rack under the above-stated scheme,
but with the sizes: Length - 3,5 m. Width - 0,2 m. Height - 0,2 m.
Let's place our two objects concerning the beginning of co-ordinates and
each other, simply moving their mouse in the projection necessary to us,
considering earth level (on a mark 0) and that shutters of gate should be above
this level on 30-40 see for a rail which at us will settle down under them.
Here, that should turn out:
Actually, that's all, the second part of gate we is simple clone mirror,
but hardly later.
Now we will impose textures, to begin with, on shutters. Allocate boxing of a shutter of gate
and, having pressed the right button of the mouse on any of projections, in the
appeared menu choose point Hide Unselected, it is necessary that we were not
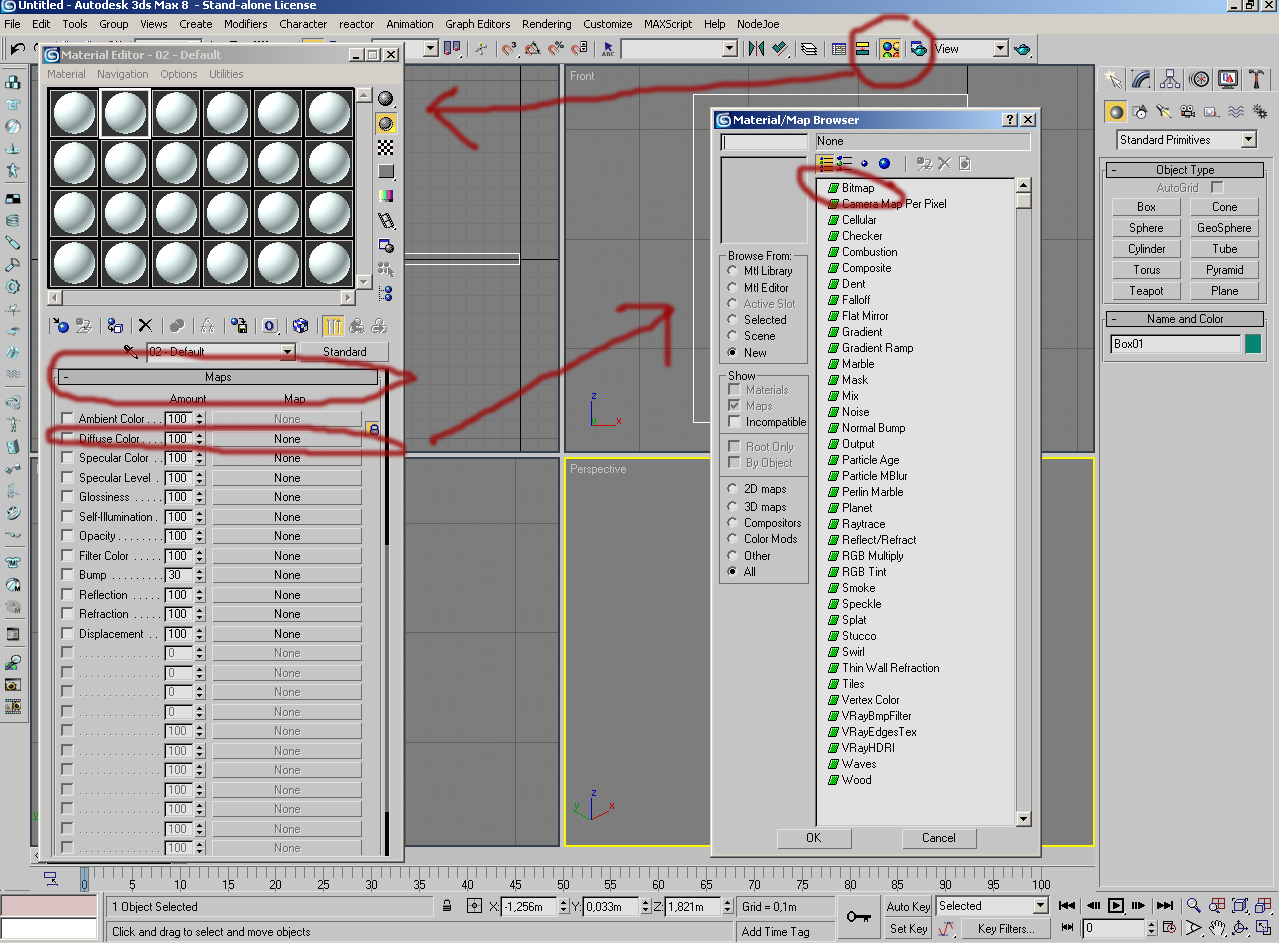
stirred by our rack when we will be texturing a shutter (basically, it. We go
to roll Map, we press menu Material Editor (button M) to do a button, where the
name of a file with a texture (now there none not necessarily as the model
simple, but in more difficult models is function to you very much it is
useful). Further we choose basically) which concerns point Diffuse Color should
be specified. In the opened new menu we choose the very first point Bitmap, we
click two times with a mouse, further we specify a way to a texture file.
Preliminary, it is desirable to create a separate folder where you will keep a
file with a texture, an initial file and files for export in Trainz.
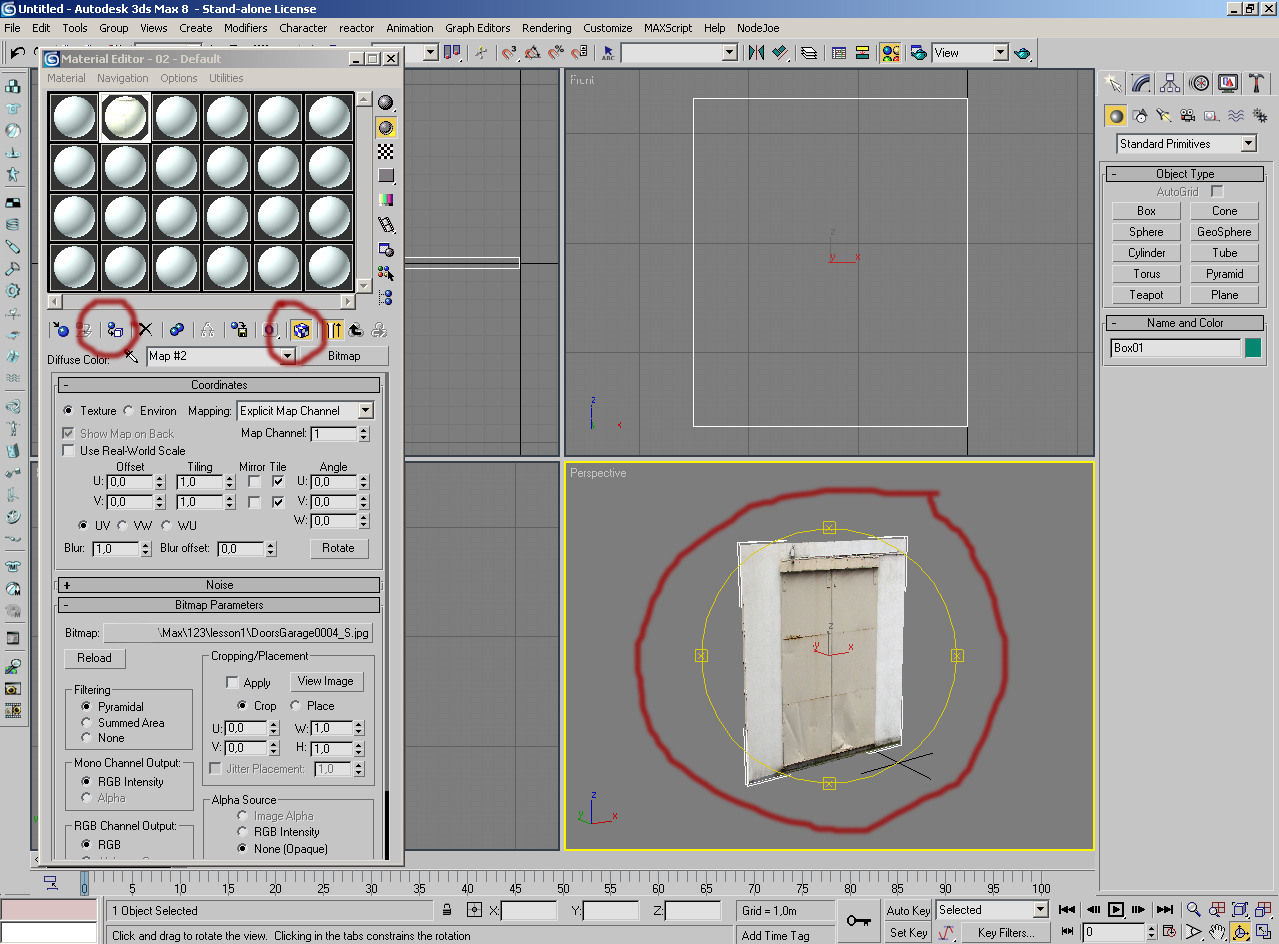
Further in Material editor it is chosen in the menu located at once
under the panel of a kind of materials, button Assign Material to Selection and
it is pressed it, then in the same place, but more to the right, we press -
Show map in viewport. All it is done having convinced, that our shutter is
allocated (is painted in white colour). The shutter should become painted in our
structure:
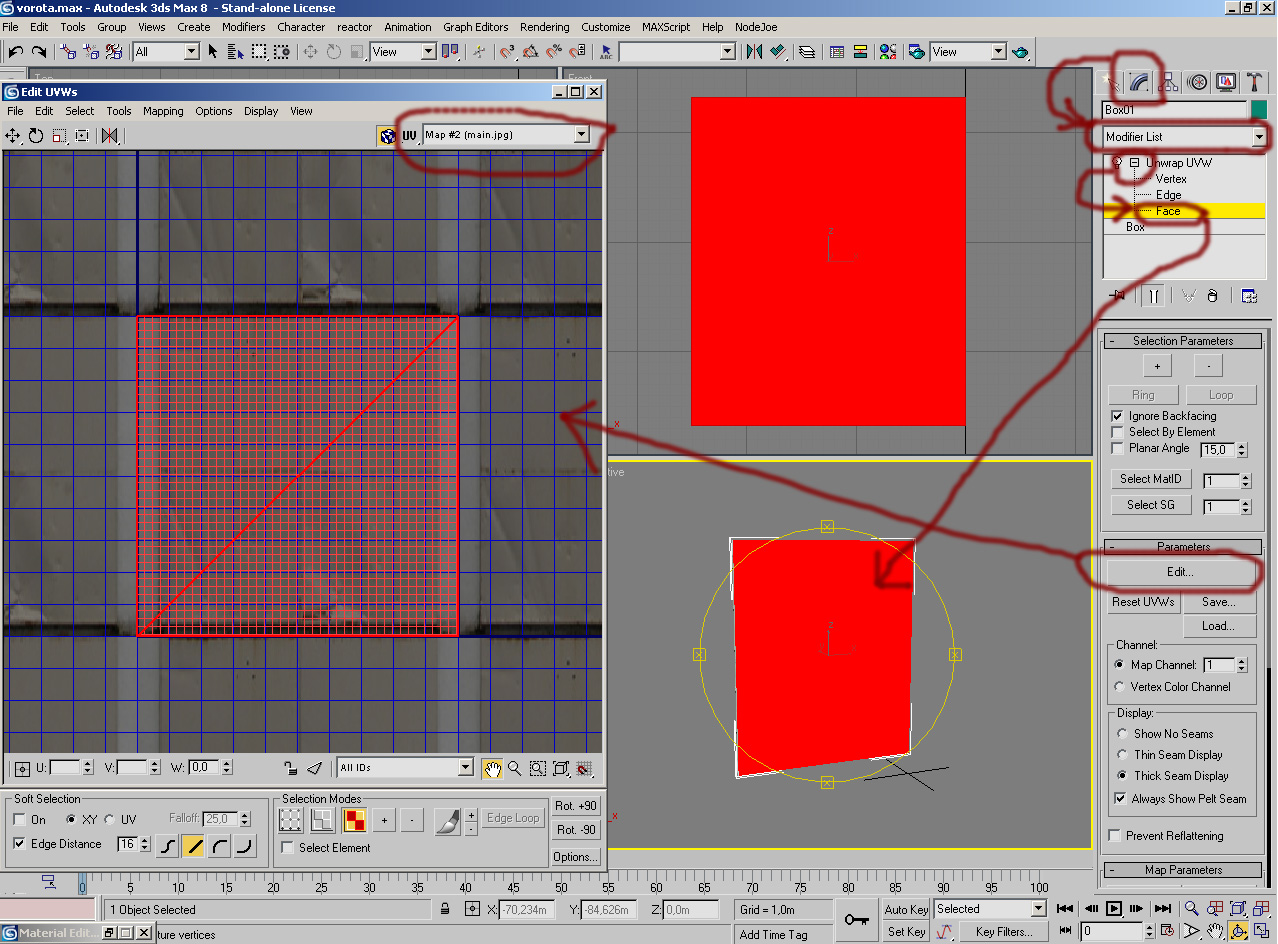
We need to modify structure position on a shutter. For this purpose we
come into menu Modify, preliminary having allocated our shutter. In roll Modify
list we choose modifier Unwrap UVW. Further we develop a dagger-subsection in
front of the modifier, we leave on subtotal Face, we allocate the surface
necessary to us, we press button Edit. In the appeared menu in the right top
corner in a revealing field it is chosen our card.
Then, by means of navigation buttons in the left top corner of kind Edit
UVW it is adjusted our plane to the size of a shutter on a structure. Also we
look, that has turned out in projection Perespective (what to see a structure
on object simply clean surface allocation, having pressed once again on
subtotal Face):
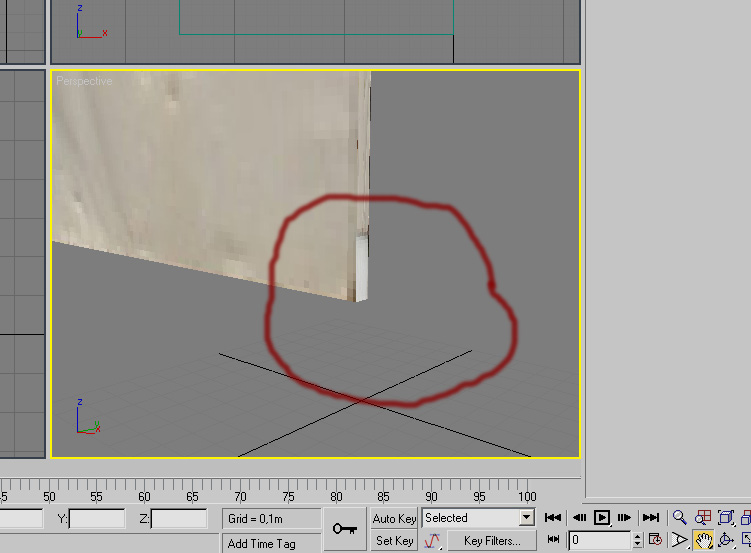
It is necessary to check up that the structure has laid down correctly.
In case of what again press subtotal Face and edit surface position on a
structure. Now the same we will do with shutter end faces to clean on corners
our concrete.
At work with end faces, probably, places require to turn an edited
surface on 90 degrees.
Having finished with a shutter, we close menu Edit UVW, we activate
pressing by the right button of the mouse any projection of the menu and we press
on Unhide all, displaying concealment objects, in our case - a rack. Texturing
under the same scheme our rack, but using that part where the wall on our
structure is located painted.
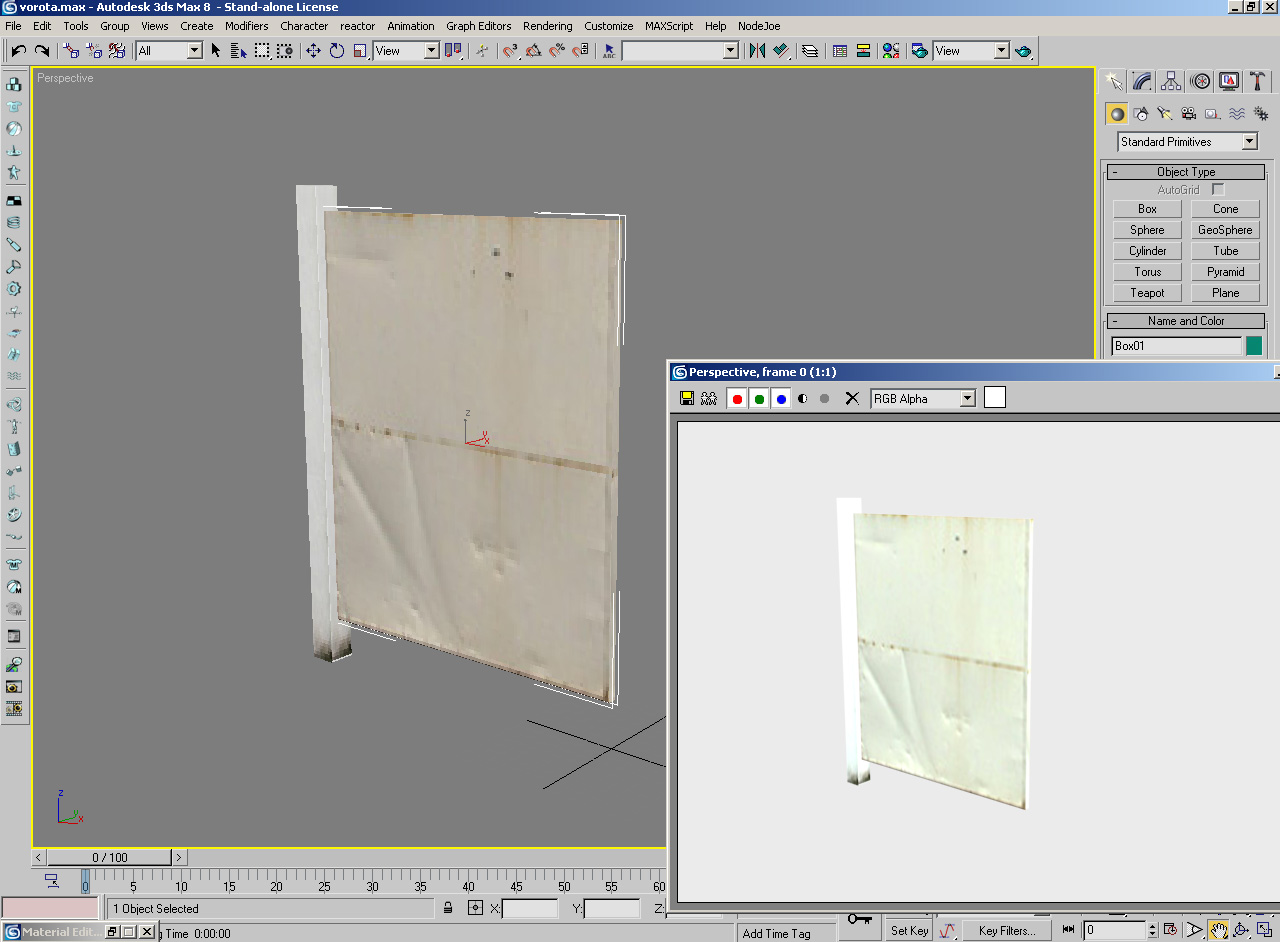
Can even rendering turned
out model:
Now it is possible to do the second part of gate. It is for this purpose
allocated both our boxings, further we press Ctr+V or we move the mouse with
pressed Shift, in the appeared window we put a tick on Copy. Further we come
into menu Tools, we press Mirror, at me left on an axis X. Further simply we
put the second part of gate on the place. On it it would be possible to finish
modelling, but the second shutter of gate it is necessary for realness texturing
separately, after all our structure contains both shutters. You already know,
how it to do.
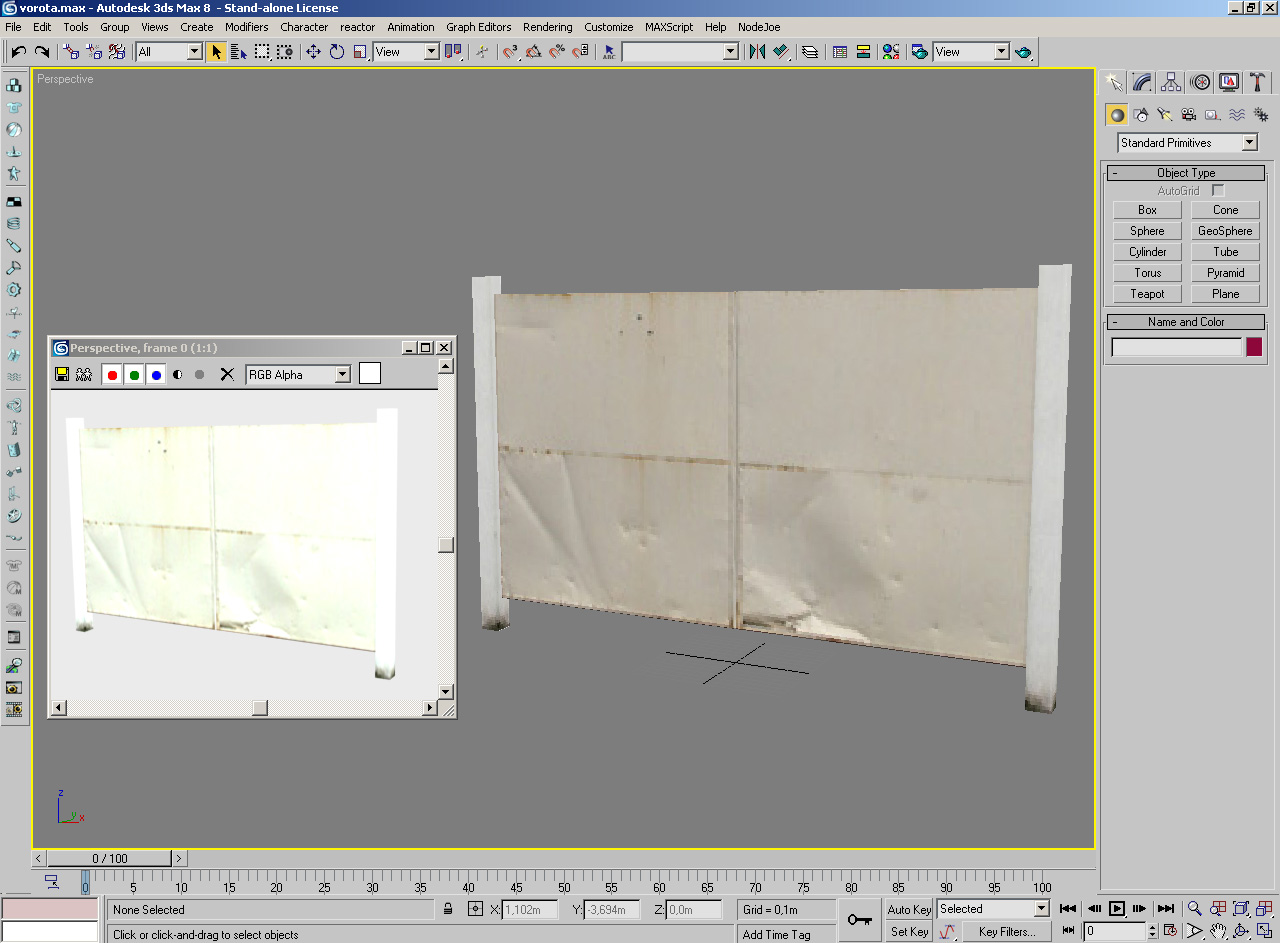
Here definitive result:
Continuation see the
Part 2.
Категория: Мои уроки | Добавил: Lana (06.07.2008)
| Автор: Neoklai